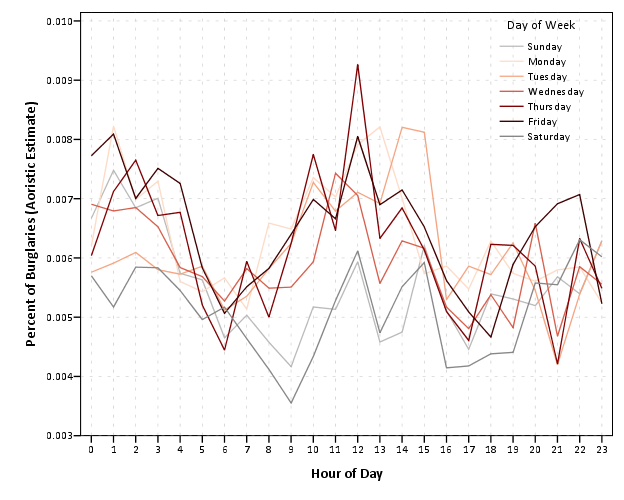
For graphs in syntax SPSS can specify continuous color ramps. Here I will illustrate a few tricks I have found useful, as well as provide alternatives to the default rainbow color ramps SPSS uses when you don’t specify the colors yourself. First we will start with a simple set of fake data.
INPUT PROGRAM.
LOOP #i = 1 TO 30.
  LOOP #j = 1 TO 30.
    COMPUTE x = #i.
    COMPUTE y = #j.
    END CASE.
  END LOOP.
END LOOP.
END FILE.
END INPUT PROGRAM.
DATASET NAME Col.
FORMATS x y (F2.0).
EXECUTE.
The necessary GGRAPH code to make a continuous color ramp is pretty simple, just include a scale variable and map it to a color.
*Colors vary by X, bar graph default rainbow.
TEMPORARY.
SELECT IF y = 1.
GGRAPH
  /GRAPHDATASET NAME="graphdataset" VARIABLES=x y
  /GRAPHSPEC SOURCE=INLINE.
BEGIN GPL
  SOURCE: s=userSource(id("graphdataset"))
  DATA: x=col(source(s), name("x"), unit.category())
  DATA: xC=col(source(s), name("x"))
  DATA: y=col(source(s), name("y"))
  GUIDE: axis(dim(1), null())
  GUIDE: axis(dim(2), null())
  SCALE: linear(dim(2), min(0), max(1))
  ELEMENT: interval(position(x*y), shape.interior(shape.square), color.interior(xC),
           transparency.exterior(transparency."1"))
END GPL.
EXECUTE.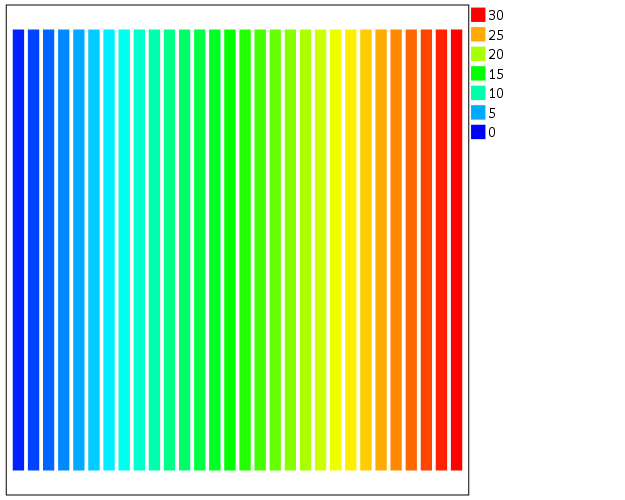
The TEMPORARY statement is just so the bars have only one value passed, and in the inline GPL I also specify that the outsides of the bars are fully transparent. The necessary code is simply creating a variable, here xC, that is continuous and mapping it to a color in the ELEMENT statement using color.interior(xC). Wilkinson in the Grammar of Graphics discusses that even for continuous color ramps he prefers a discrete color legend, which is the behavior in SPSS.
The default color ramp is well known to be problematic, so I will provide some alternatives. A simple choice suitable for many situations is simply a grey-scale chart. To make this you have to make a separate SCALE statement in the inline GPL, and set the aestheticMinimum and the aestheticMaximum. Besides that one additional SCALE statement, the code is the same as before.
*Better color scheme based on grey-scale.
TEMPORARY.
SELECT IF y = 1.
GGRAPH
  /GRAPHDATASET NAME="graphdataset" VARIABLES=x y
  /GRAPHSPEC SOURCE=INLINE.
BEGIN GPL
  SOURCE: s=userSource(id("graphdataset"))
  DATA: x=col(source(s), name("x"), unit.category())
  DATA: xC=col(source(s), name("x"))
  DATA: y=col(source(s), name("y"))
  GUIDE: axis(dim(1), null())
  GUIDE: axis(dim(2), null())
  SCALE: linear(dim(2), min(0), max(1))
  SCALE: linear(aesthetic(aesthetic.color.interior),
         aestheticMinimum(color.lightgrey), aestheticMaximum(color.black))
  ELEMENT: interval(position(x*y), shape.interior(shape.square), color.interior(xC),
           transparency.exterior(transparency."1"))
END GPL.
EXECUTE.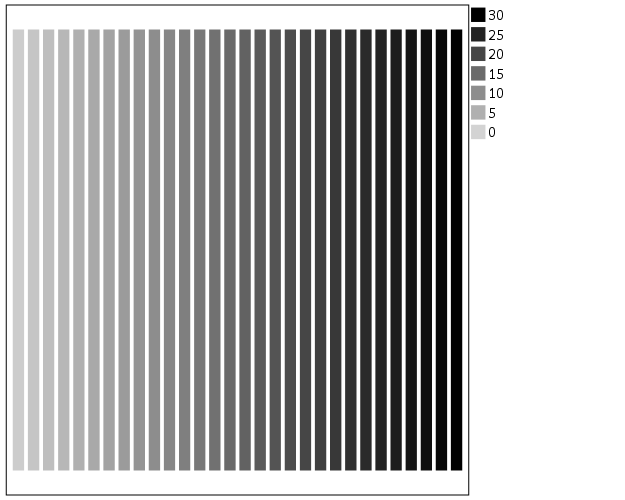
Another option I like is to make a grey-to-red scale ramp (which is arguably diverging or continuous).
*Grey to red.
TEMPORARY.
SELECT IF y = 1.
GGRAPH
  /GRAPHDATASET NAME="graphdataset" VARIABLES=x y
  /GRAPHSPEC SOURCE=INLINE.
BEGIN GPL
  SOURCE: s=userSource(id("graphdataset"))
  DATA: x=col(source(s), name("x"), unit.category())
  DATA: xC=col(source(s), name("x"))
  DATA: y=col(source(s), name("y"))
  GUIDE: axis(dim(1), null())
  GUIDE: axis(dim(2), null())
  SCALE: linear(dim(2), min(0), max(1))
  SCALE: linear(aesthetic(aesthetic.color.interior),
         aestheticMinimum(color.black), aestheticMaximum(color.red))
  ELEMENT: interval(position(x*y), shape.interior(shape.square), color.interior(xC),
           transparency.exterior(transparency."1"))
END GPL.
EXECUTE.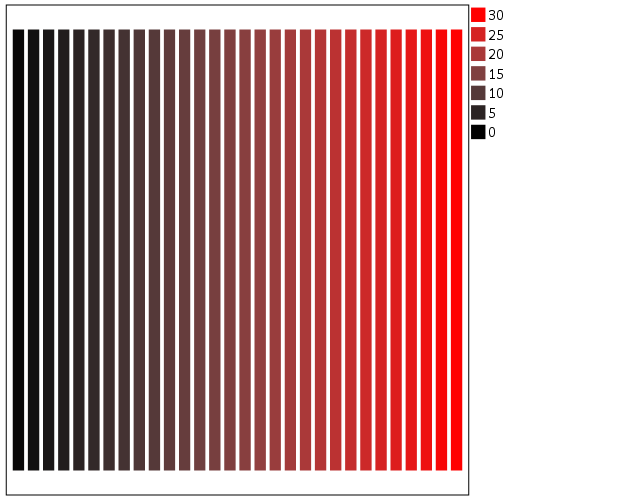
To make an nice looking interpolation with these anchors is pretty difficult, but another one I like is the green to purple. It ends up looking quite close to the associated discrete color ramp from the ColorBrewer palettes.
*Diverging color scale, purple to green.
TEMPORARY.
SELECT IF y = 1.
GGRAPH
  /GRAPHDATASET NAME="graphdataset" VARIABLES=x y
  /GRAPHSPEC SOURCE=INLINE.
BEGIN GPL
  SOURCE: s=userSource(id("graphdataset"))
  DATA: x=col(source(s), name("x"), unit.category())
  DATA: xC=col(source(s), name("x"))
  DATA: y=col(source(s), name("y"))
  GUIDE: axis(dim(1), null())
  GUIDE: axis(dim(2), null())
  SCALE: linear(dim(2), min(0), max(1))
  SCALE: linear(aesthetic(aesthetic.color.interior),
         aestheticMinimum(color.green), aestheticMaximum(color.purple))
  ELEMENT: interval(position(x*y), shape.interior(shape.square), color.interior(xC),
           transparency.exterior(transparency."1"))
END GPL.
EXECUTE.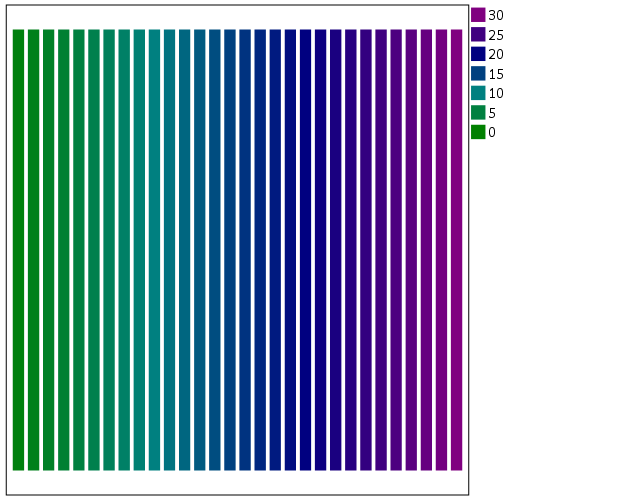
In cartography, whether one uses diverging or continuous ramps is typically related to the data, e.g. if the data has a natural middle point use diverging (e.g. differences with zero at the middle point). I don’t really like this advice though, as pretty much any continuous number can be reasonably turned into a diverging number (e.g. continuous rates to location quotients, splitting at the mean, residuals from a regression, whatever). So I would make the distinction like this, the ramp decides what elements you end up emphasizing. If you want to emphasize the extremes of both ends of the distribution use a diverging ramp, if you only want to emphasize one end use a continuous ramp. There are many situations with natural continuous numbers that we want to emphasize both ends of the ramp based on the questions the map or graph is intended to answer.
Going along with this, you may want the middle break to not be in the middle of the actual data. To set the anchors according to an external benchmark, you can use the min and max function within the same SCALE statement that you specify the colors. Here is an example with the black-to-red color ramp, but I set the minimum lower than the data are, so the ramp starts at a more grey location.
*Setting the break with the external min.
TEMPORARY.
SELECT IF y = 1.
GGRAPH
  /GRAPHDATASET NAME="graphdataset" VARIABLES=x y
  /GRAPHSPEC SOURCE=INLINE.
BEGIN GPL
  SOURCE: s=userSource(id("graphdataset"))
  DATA: x=col(source(s), name("x"), unit.category())
  DATA: xC=col(source(s), name("x"))
  DATA: y=col(source(s), name("y"))
  GUIDE: axis(dim(1), null())
  GUIDE: axis(dim(2), null())
  SCALE: linear(dim(2), min(0), max(1))
  SCALE: linear(aesthetic(aesthetic.color.interior),
         aestheticMinimum(color.black), aestheticMaximum(color.red),
         min(-10), max(30))
  ELEMENT: interval(position(x*y), shape.interior(shape.square), color.interior(xC),
           transparency.exterior(transparency."1"))
END GPL.
EXECUTE.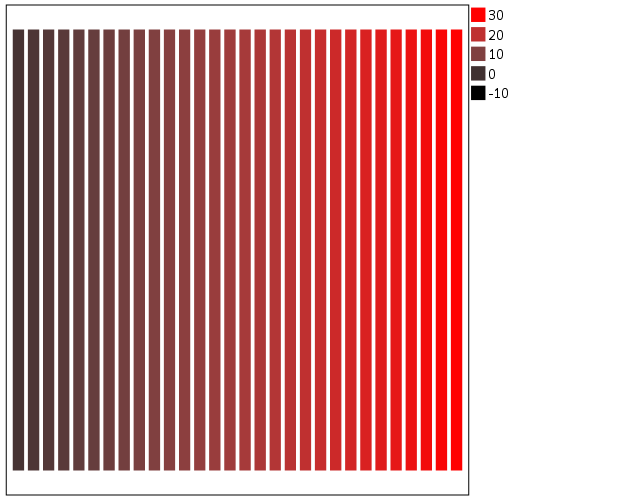
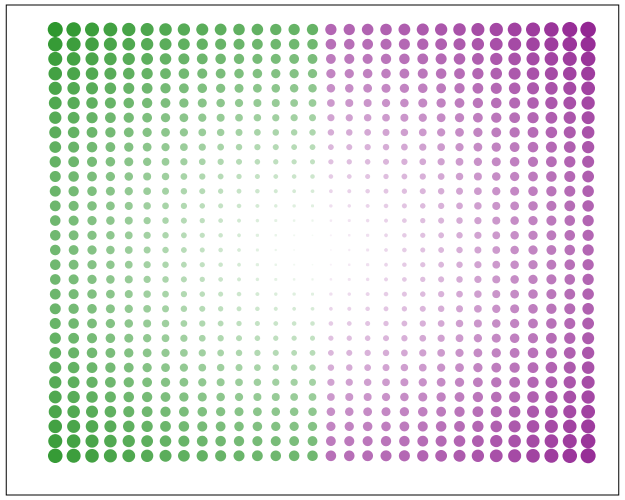
Another trick I like using often is to map discrete colors, and then use transparency to create a continuous ramp (most of the examples I use here could be replicated by specifying the color saturation as well). Here I use two colors and make points more towards the center of the graph more transparent. This can be extended to multiple color bins, see this post on Stackoverflow. Related are value-by-alpha maps, using more transparent to signify more uncertainty in the data (or to draw less attention to those areas). (That linked stackoverflow post wanted to emphasize the middle break for diverging data, but the point remains the same, make things you want to de-emphasize more transparent and things to want to emphasize more saturated.)
*Using transparency and fixed color bins.
RECODE x (1 THRU 15 = 1)(ELSE = 2) INTO XBin.
FORMATS XBin (F1.0).
COMPUTE Dis = -1*SQRT((x - 15)**2 + (y - 15)**2).
FORMATS Dis (F2.0).
GGRAPH
  /GRAPHDATASET NAME="graphdataset" VARIABLES=x y Dis XBin
  /GRAPHSPEC SOURCE=INLINE.
BEGIN GPL
  SOURCE: s=userSource(id("graphdataset"))
  DATA: x=col(source(s), name("x"))
  DATA: y=col(source(s), name("y"))
  DATA: Dis=col(source(s), name("Dis"))
  DATA: XBin=col(source(s), name("XBin"), unit.category())
  GUIDE: axis(dim(1), null())
  GUIDE: axis(dim(2), null())
  SCALE: cat(aesthetic(aesthetic.color.interior), map(("1",color.green),("2",color.purple)))
  ELEMENT: point(position(x*y), color.interior(XBin),
           transparency.exterior(transparency."1"), transparency.interior(Dis))
END GPL.
Another powerful visualization tool to emphasize (or de-emphasize) certain points is to map the size of an element in addition to transparency. This is a great tool to add more information to scatterplots.
*Using redundant with size.
GGRAPH
  /GRAPHDATASET NAME="graphdataset" VARIABLES=x y Dis XBin
  /GRAPHSPEC SOURCE=INLINE.
BEGIN GPL
  SOURCE: s=userSource(id("graphdataset"))
  DATA: x=col(source(s), name("x"))
  DATA: y=col(source(s), name("y"))
  DATA: Dis=col(source(s), name("Dis"))
  DATA: XBin=col(source(s), name("XBin"), unit.category())
  GUIDE: axis(dim(1), null())
  GUIDE: axis(dim(2), null())
  SCALE: linear(aesthetic(aesthetic.size), aestheticMinimum(size."1"),
         aestheticMaximum(size."18"), reverse())
  SCALE: cat(aesthetic(aesthetic.color.interior), map(("1",color.green),("2",color.purple)))
  ELEMENT: point(position(x*y), color.interior(XBin),
           transparency.exterior(transparency."1"), transparency.interior(Dis), size(Dis))
END GPL.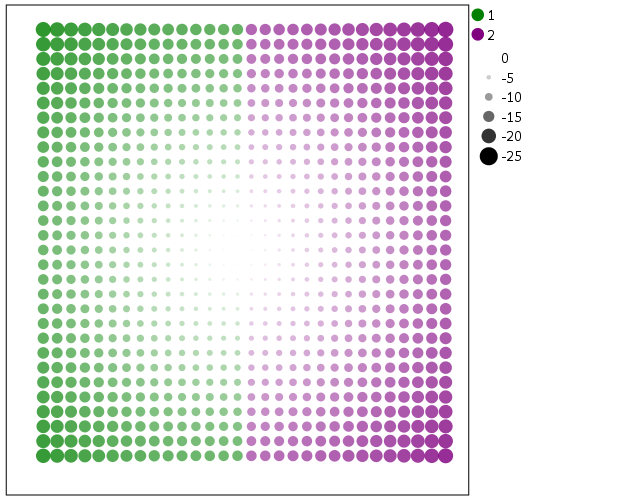
Finally, if you want SPSS to omit the legend (or certain aesthetics in the legend) you have to specify a GUIDE: legend statement for every mapped aesthetic. Here is the previous scatterplot omitting all legends.
*IF you want the legend omitted.
GGRAPH
  /GRAPHDATASET NAME="graphdataset" VARIABLES=x y Dis XBin
  /GRAPHSPEC SOURCE=INLINE.
BEGIN GPL
  SOURCE: s=userSource(id("graphdataset"))
  DATA: x=col(source(s), name("x"))
  DATA: y=col(source(s), name("y"))
  DATA: Dis=col(source(s), name("Dis"))
  DATA: XBin=col(source(s), name("XBin"), unit.category())
  GUIDE: axis(dim(1), null())
  GUIDE: axis(dim(2), null())
  GUIDE: legend(aesthetic(aesthetic.color), null())
  GUIDE: legend(aesthetic(aesthetic.transparency), null())
  GUIDE: legend(aesthetic(aesthetic.size), null())
  SCALE: linear(aesthetic(aesthetic.size), aestheticMinimum(size."1"),
         aestheticMaximum(size."18"), reverse())
  SCALE: cat(aesthetic(aesthetic.color.interior), map(("1",color.green),("2",color.purple)))
  ELEMENT: point(position(x*y), color.interior(XBin),
           transparency.exterior(transparency."1"), transparency.interior(Dis), size(Dis))
END GPL.