
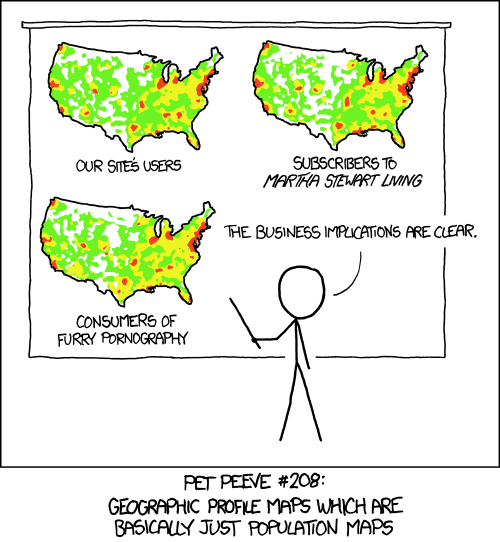
When making kernel density maps sometimes the phenonema is heavily clustered in particular locations simply because the population at risk is uneven over the study space. xkcd puts this in a bit more of laymans terms than I do:
So how do we take into account the underlying population? It depends on the data, but if you actually have population at risk data as points we can make kernel density maps that are the ratio of the cases to the underlying total population. I will show how you can do this type of raster kernel density estimate in CrimeStat using some data on reported assaults and arrests from the city of Chicago.
To make the necessary smooth estimate of the proportions of arrests in CrimeStat you will need two seperate ones, the first primary file should be all arrests of interest, and the secondary file should be all of the incidents (so the arrests are a subset of all incidents). And of course both files need to have the geocoordinates already.
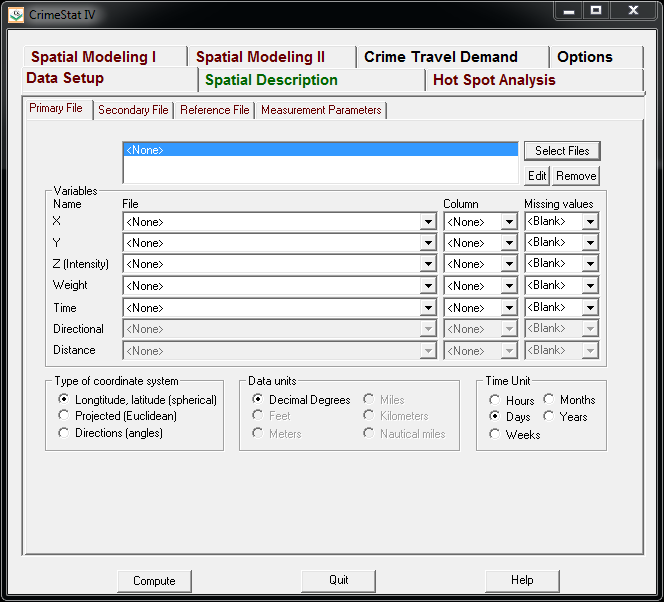
So CrimeStat has a nice GUI to make our KDE maps. So you will be greeted with the following screen after starting the CrimeStat program.
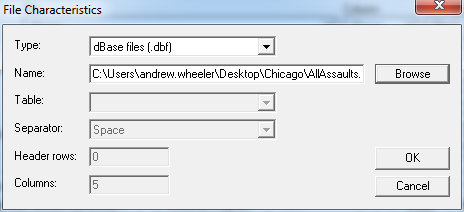
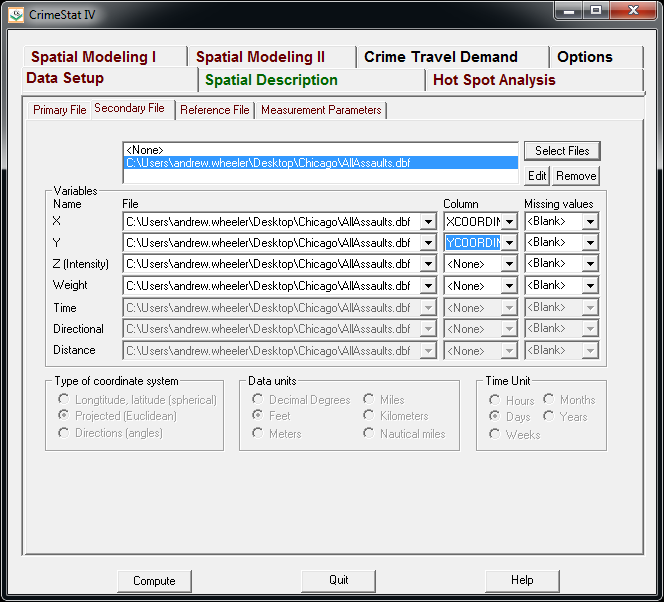
Now we can enter in our data. First click the Select Files button and then navigate to your data file. Here I saved the seperate files as DBFs, and for the primary file I use all of the arrests associated with an assault incident in Chicago in 2013.
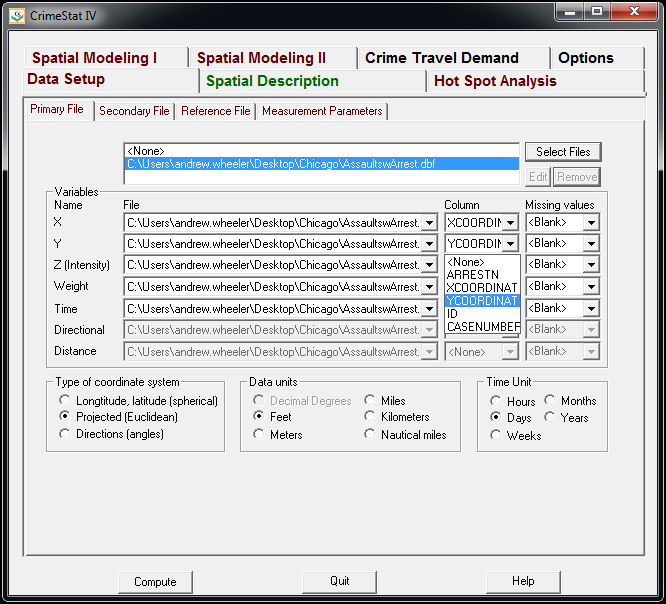
Now that the file is loaded into CrimeStat, we need to specify what fields contain the spatial coordinates in the variables section. Then we set the appropriate options in the bottom panels. Here I am using projected coordinates in feet. I don’t specify a time unit so that option is superflous.
Now we can enter in our secondary file, which will be all of the assault incidents in Chicago in 2013. The Seconday File tab is in the set of minor tabs under the larger Data Setup tab (CrimeStat has an incredible number of routines, hence the many options). It is an equivalent workflow as to that of the primary file, import the spreadsheet, and define the fields.
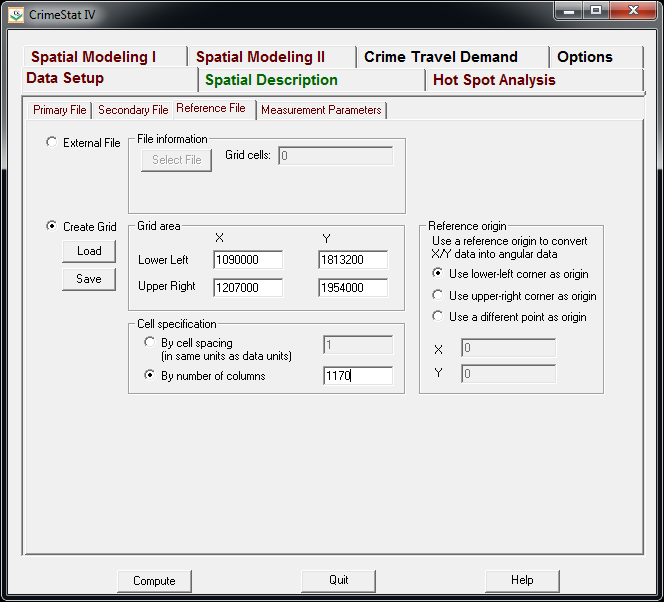
Now we need to set up the reference grid to which we will write the raster output to. Still on the same Data Setup main tab, we then navigate to the Reference file minor tab. Here we specify a set of coordinates (in the particular projection of use) as a rectangle corresponding to the lower left and upper right corners. Then you can control how fine the grid is by specifying a larger number of columns. Here the cell sizes are 300 square feet. Note you can save the particular reference file for future use.
Now we can finally move onto estimating our kernel density map! Now navigate to the main Spatial Modeling I tab and navigate to the Interpolation I minor tab. To make a ratio of our two rasters (which will be the smoothed proportions of arrests). Here we choose the Dual KDE estimation, and specify the normal kernel. Typically for KDE maps the kernel makes very little difference, choosing an appropriate bandwidth impacts the look of the map to a much greater extent. I typically default to around 300 meters, but here I choose a smaller 500 foot bandwidth (we will see this is seriously undersmoothed – but I rather start with undersmoothed than oversmoothed).
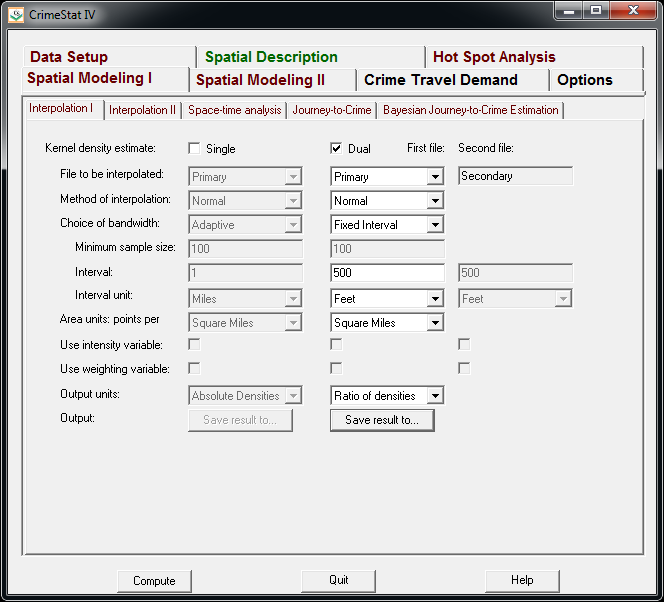
The field Area units: points per ends up being superflous when specifying the ratio of the two densities. Clicking on the Save Result to button we can choose to save the output to various geographic data file formats (both vector and raster). Here I specify ArcGIS’s raster format.
Now we are ready to calculate the KDE raster. Simply click the Compute button at the bottom of CrimeStat, and be alittle patient with a dataset of this size (4,000 some arrests and over 17,500 total incidents). After that runs we can then import the rasters into your favorite GIS and make some maps.
You will notice when you first upload the raster there are several strange artifacts. This is a function of places with very few incidents have a low baseline with with to calculate the smoothed proportion of arrests. Unfortunately it appears CrimeStat specifies 0 where null data values should be (places with zero density in the denominator).

A quick fix to this problem though is to make a separate kernel density map of just the incidents and superimpose that on top of your smoothed arrests. Then you can make the zero density areas the same color as the background map so they are filtered out. Here I filter areas that have a incident density of less than <0.02 (these are absolute densities, so they sum to the total number of incidents used to calculate them to begin with).
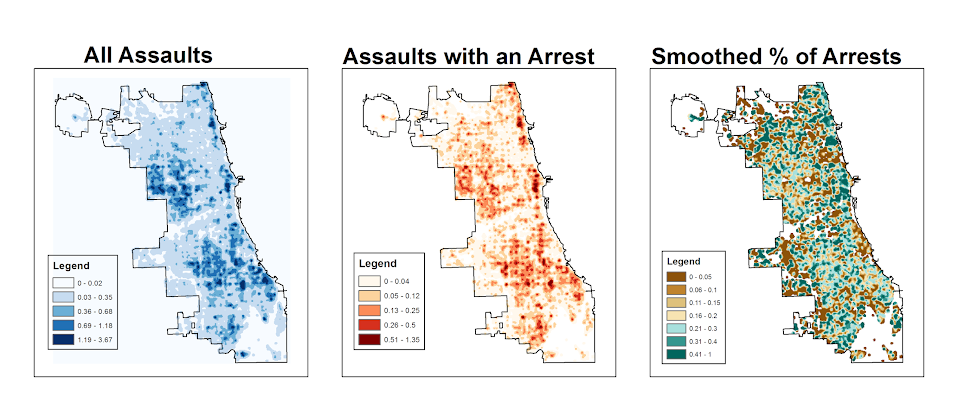
So below are the final KDE maps. As you can see from all of them 500 feet is seriously undersmoothed, but the absolute densities of incidents and arrests (the two left most maps) appears to be highly correlated. If you look at the hit rate of arrests though in the right most map, the percent of arrests appear to be spatially random.
Other possibilities for similar analysis are say accidents involving injury or pedestrians where the baseline is all accidents, field stops that result in contraband recovery, or comparison of densities before and after an intervention (although here I may take the absolute difference as opposed to the ratio).
Of course this just scratches the surface of possible analysis. When the population at risk is not so conveniently labelled in the data set, such as coming from census geographies, one may consult the literature on dasymetric mapping (also see the head bang procedure in CrimeStat). Bivand et al. (2008) have an example of calculating the ratio raster along with some statistical tests, and the spatstat library has some more convenient functions to accomplish this and map the results (see the relrisk function). One can also estimate a logistic regression model with the spatial coordinates as non-linear predictors (e.g. using splines) and then plot the predicted probabilities for each grid cell.
I’m not sure of a quick global test of whether the proportion of arrests are random though. I thought off-hand you could use a spatial scan test for the case-control data (e.g. using SatScan or similar functions in the spatstat R library), although I’m not sure if that counts as quick.

