On my prior post on estimating group based trajectory models in R using the crimCV package I received a comment asking about how to plot the trajectories. The crimCV model object has a base plot object, but here I show how to extract those model predictions as well as some other functions. Many of these plots are illustrated in my paper for crime trajectories at micro places in Albany (forthcoming in the Journal of Quantitative Criminology). First we are going to load the crimCV and the ggplot2 package, and then I have a set of four helper functions which I will describe in more detail in a minute. So run this R code first.
library(crimCV)
library(ggplot2)

long_traj <- function(model,data){
  df <- data.frame(data)
  vars <- names(df)
  prob <- model['gwt'] #posterior probabilities
  df$GMax <- apply(prob$gwt,1,which.max) #which group # is the max
  df$PMax <- apply(prob$gwt,1,max)       #probability in max group
  df$Ord <- 1:dim(df)[1]                 #Order of the original data
  prob <- data.frame(prob$gwt)
  names(prob) <- paste0("G",1:dim(prob)[2]) #Group probabilities are G1, G2, etc.
  longD <- reshape(data.frame(df,prob), varying = vars, v.names = "y",
                   timevar = "x", times = 1:length(vars),
                   direction = "long") #Reshape to long format, time is x, y is original count data
  return(longD)                        #GMax is the classified group, PMax is the probability in that group
}

weighted_means <- function(model,long_data){
  G_names <- paste0("G",1:model$ng)
  G <- long_data[,G_names]
  W <- G*long_data$y                                    #Multiple weights by original count var
  Agg <- aggregate(W,by=list(x=long_data$x),FUN="sum")  #then sum those products
  mass <- colSums(model$gwt)                            #to get average divide by total mass of the weight
  for (i in 1:model$ng){
    Agg[,i+1] <- Agg[,i+1]/mass[i]
  }
  long_weight <- reshape(Agg, varying=G_names, v.names="w_mean",
                         timevar = "Group", times = 1:model$ng,
                         direction = "long")           #reshape to long
  return(long_weight)
}

pred_means <- function(model){
    prob <- model$prob               #these are the model predicted means
    Xb <- model$X %*% model$beta     #see getAnywhere(plot.dmZIPt), near copy
    lambda <- exp(Xb)                #just returns data frame in long format
    p <- exp(-model$tau * t(Xb))
    p <- t(p)
    p <- p/(1 + p)
    mu <- (1 - p) * lambda
    t <- 1:nrow(mu)
    myDF <- data.frame(x=t,mu)
    long_pred <- reshape(myDF, varying=paste0("X",1:model$ng), v.names="pred_mean",
                         timevar = "Group", times = 1:model$ng, direction = "long")
    return(long_pred)
}

#Note, if you estimate a ZIP model instead of the ZIP-tau model
#use this function instead of pred_means
pred_means_Nt <- function(model){
    prob <- model$prob               #these are the model predicted means
    Xb <- model$X %*% model$beta     #see getAnywhere(plot.dmZIP), near copy
    lambda <- exp(Xb)                #just returns data frame in long format
	Zg <- model$Z %*% model$gamma
    p <- exp(Zg)
    p <- p/(1 + p)
    mu <- (1 - p) * lambda
    t <- 1:nrow(mu)
    myDF <- data.frame(x=t,mu)
    long_pred <- reshape(myDF, varying=paste0("X",1:model$ng), v.names="pred_mean",
                         timevar = "Group", times = 1:model$ng, direction = "long")
    return(long_pred)
}

occ <- function(long_data){
 subdata <- subset(long_data,x==1)
 agg <- aggregate(subdata$PMax,by=list(group=subdata$GMax),FUN="mean")
 names(agg)[2] <- "AvePP" #average posterior probabilites
 agg$Freq <- as.data.frame(table(subdata$GMax))[,2]
 n <- agg$AvePP/(1 - agg$AvePP)
 p <- agg$Freq/sum(agg$Freq)
 d <- p/(1-p)
 agg$OCC <- n/d #odds of correct classification
 agg$ClassProp <- p #observed classification proportion
 #predicted classification proportion
 agg$PredProp <- colSums(as.matrix(subdata[,grep("^[G][0-9]", names(subdata), value=TRUE)]))/sum(agg$Freq)
 #Jeff Ward said I should be using PredProb instead of Class prop for OCC
 agg$occ_pp <- n/ (agg$PredProp/(1-agg$PredProp))
 return(agg)
}
Now we can just use the data in the crimCV package to run through an example of a few different types of plots. First lets load in the TO1adj data, estimate the group based model, and make our base plot.
data(TO1adj)
out1 <-crimCV(TO1adj,4,dpolyp=2,init=5)
plot(out1)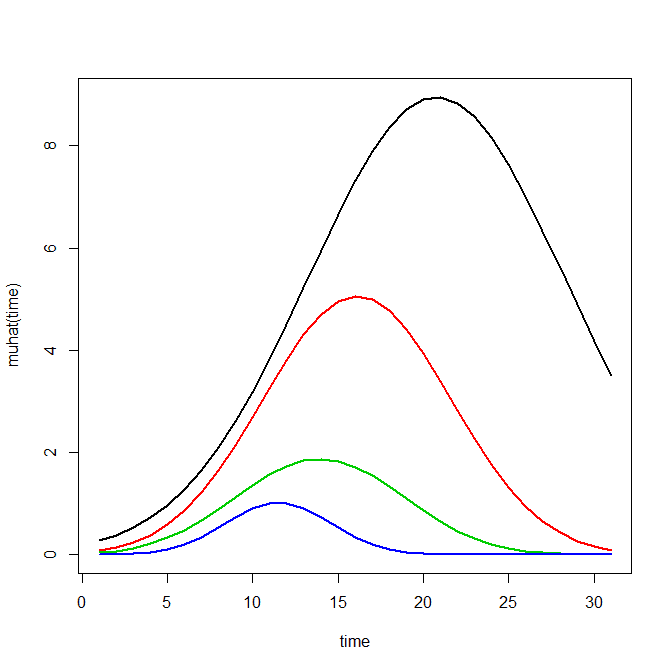
Now most effort seems to be spent on using model selection criteria to pick the number of groups, what may be called relative model comparisons. Once you pick the number of groups though, you should still be concerned with how well the model replicates the data at hand, e.g. absolute model comparisons. The graphs that follow help assess this. First we will use our helper functions to make three new objects. The first function, long_traj, takes the original model object, out1, as well as the original matrix data used to estimate the model, TO1adj. The second function, weighted_means, takes the original model object and then the newly created long_data longD. The third function, pred_means, just takes the model output and generates a data frame in wide format for plotting (it is the same underlying code for plotting the model).
longD <- long_traj(model=out1,data=TO1adj)
x <- weighted_means(model=out1,long_data=longD)
pred <- pred_means(model=out1)
We can subsequently use the long data longD to plot the individual trajectories faceted by their assigned groups. I have an answer on cross validated that shows how effective this small multiple design idea can be to help disentangle complicated plots.
#plot of individual trajectories in small multiples by group
p <- ggplot(data=longD, aes(x=x,y=y,group=Ord)) + geom_line(alpha = 0.1) + facet_wrap(~GMax)
p 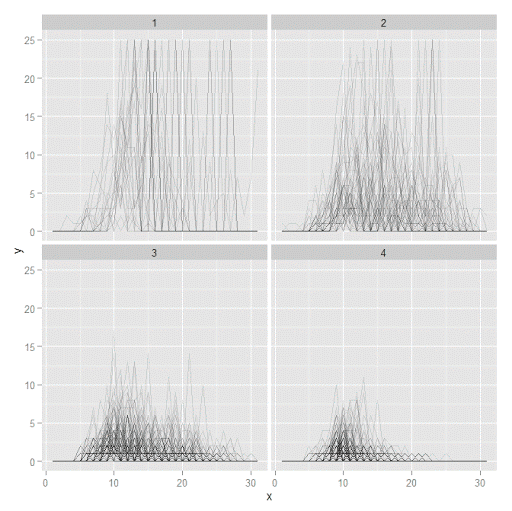
Plotting the individual trajectories can show how well they fit the predicted model, as well as if there are any outliers. You could get more fancy with jittering (helpful since there is so much overlap in the low counts) but just plotting with a high transparency helps quite abit. This second graph plots the predicted means along with the weighted means. What the weighted_means function does is use the posterior probabilities of groups, and then calculates the observed group averages per time point using the posterior probabilities as the weights.
#plot of predicted values + weighted means
p2 <- ggplot() + geom_line(data=pred, aes(x=x,y=pred_mean,col=as.factor(Group))) +
                 geom_line(data=x, aes(x=x,y=w_mean,col=as.factor(Group))) +
                geom_point(data=x, aes(x=x,y=w_mean,col=as.factor(Group)))
p2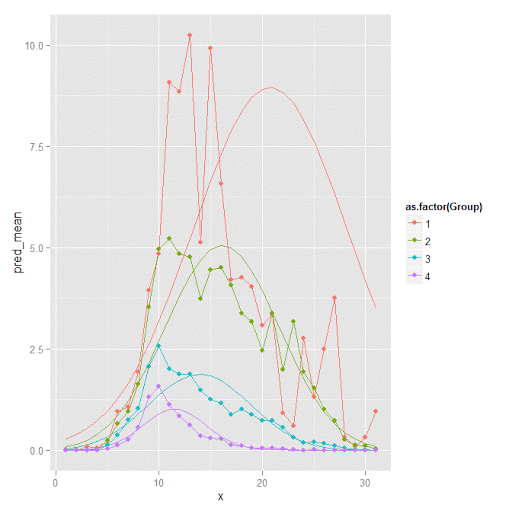
Here you can see that the estimated trajectories are not a very good fit to the data. Pretty much eash series has a peak before the predicted curve, and all of the series except for 2 don’t look like very good candidates for polynomial curves.
It ends up that often the weighted means are very nearly equivalent to the unweighted means (just aggregating means based on the classified group). In this example the predicted values are a colored line, the weighted means are a colored line with superimposed points, and the non-weighted means are just a black line.
#predictions, weighted means, and non-weighted means
nonw_means <- aggregate(longD$y,by=list(Group=longD$GMax,x=longD$x),FUN="mean")
names(nonw_means)[3] <- "y"

p3 <- p2 + geom_line(data=nonw_means, aes(x=x,y=y), col='black') + facet_wrap(~Group)
p3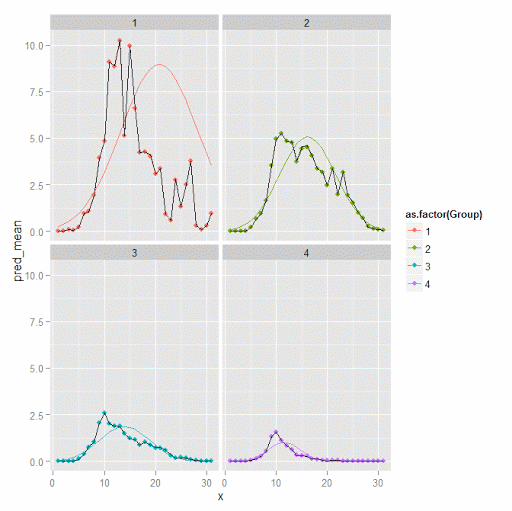
You can see the non-weighted means are almost exactly the same as the weighted ones. For group 3 you typically need to go to the hundredths to see a difference.
#check out how close
nonw_means[nonw_means$Group==3,'y'] -  x[x$Group==3,'w_mean']
You can subsequently superimpose the predicted group means over the individual trajectories as well.
#superimpose predicted over ind trajectories
pred$GMax <- pred$Group
p4 <- ggplot() + geom_line(data=pred, aes(x=x,y=pred_mean), col='red') +
                 geom_line(data=longD, aes(x=x,y=y,group=Ord), alpha = 0.1) + facet_wrap(~GMax)
p4
Two types of absolute fit measures I’ve seen advocated in the past are the average maximum posterior probability per group and the odds of correct classification. The occ function calculates these numbers given two vectors (one of the max probabilities and the other of the group classifications). We can get this info from our long data by just selecting a subset from one time period. Here the output at the console shows that we have quite large average posterior probabilities as well as high odds of correct classification. (Also updated to included the observed classified proportions and the predicted proportions based on the posterior probabilities. Again, these all show very good model fit.) Update: Jeff Ward sent me a note saying I should be using the predicted proportion in each group for the occ calculation, not the assigned proportion based on the max. post. prob. So I have updated to include the occ_pp column for this, but left the old occ column in as a paper trail of my mistake.
occ(longD)
#  group     AvePP Freq        OCC  ClassProp   PredProp     occ_pp
#1     1 0.9880945   23 1281.00444 0.06084656 0.06298397 1234.71607
#2     2 0.9522450   35  195.41430 0.09259259 0.09005342  201.48650
#3     3 0.9567524   94   66.83877 0.24867725 0.24936266   66.59424
#4     4 0.9844708  226   42.63727 0.59788360 0.59759995   42.68760
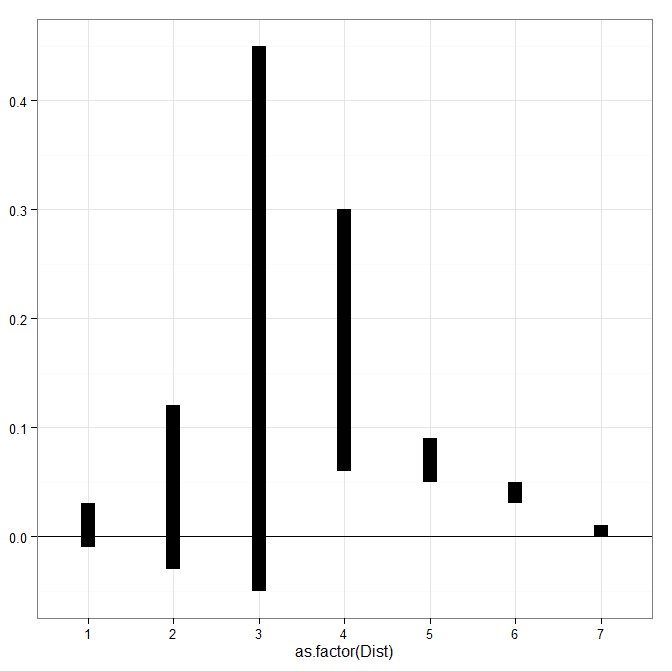
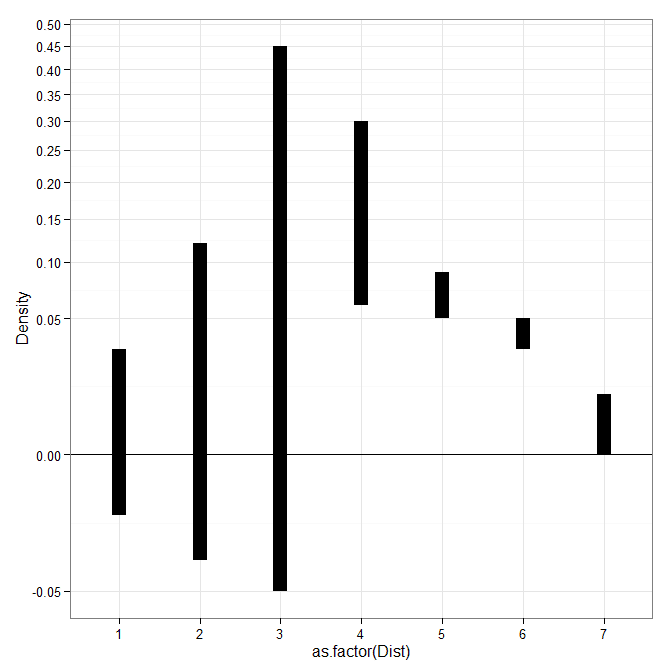
A plot to accompany this though is a jittered dot plot showing the maximum posterior probability per group. You can here that groups 3 and 4 are more fuzzy, whereas 1 and 2 mostly have very high probabilities of group assignment.
#plot of maximum posterior probabilities
subD <- longD[x==1,]
p5 <- ggplot(data=subD, aes(x=as.factor(GMax),y=PMax)) + geom_point(position = "jitter", alpha = 0.2)
p5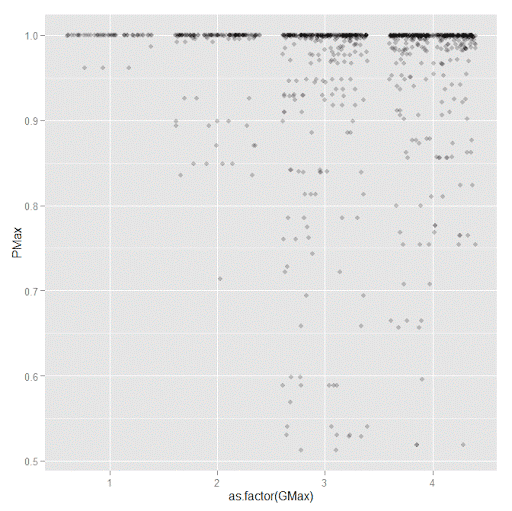
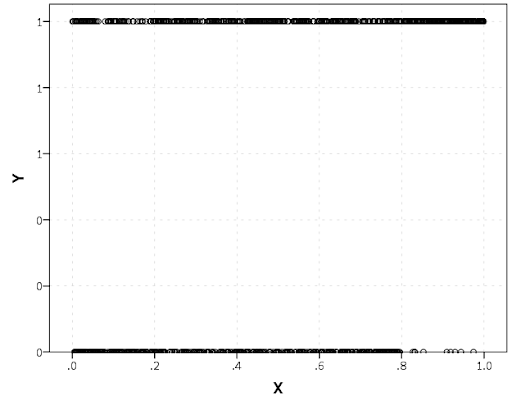
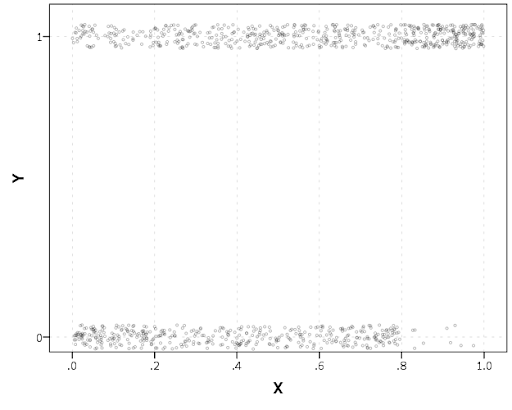
Remember that these latent class models are fuzzy classifiers. That is each point has a probability of belonging to each group. A scatterplot matrix of the individual probabilities will show how well the groups are separated. Perfect separation into groups will result in points hugging along the border of the graph, and points in the middle suggest ambiguity in the class assignment. You can see here that each group closer in number has more probability swapping between them.
#scatterplot matrix
library(GGally)
sm <- ggpairs(data=subD, columns=4:7)
sm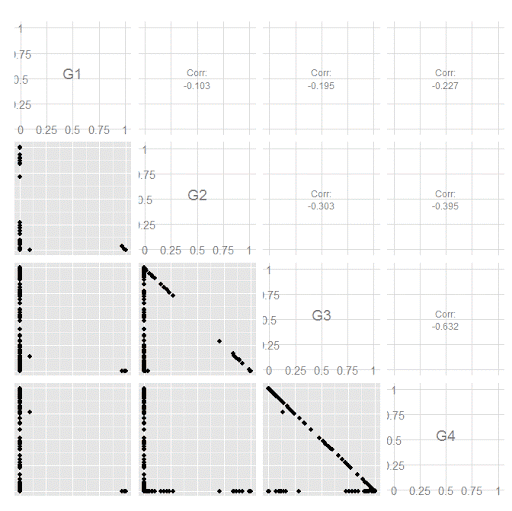
And the last time series plot I have used previously is a stacked area chart.
#stacked area chart
nonw_sum <- aggregate(longD$y,by=list(Group=longD$GMax,x=longD$x),FUN="sum")
names(nonw_sum)[3] <- "y"
p6 <- ggplot(data=nonw_sum, aes(x=x,y=y,fill=as.factor(Group))) + geom_area(position='stack')
p6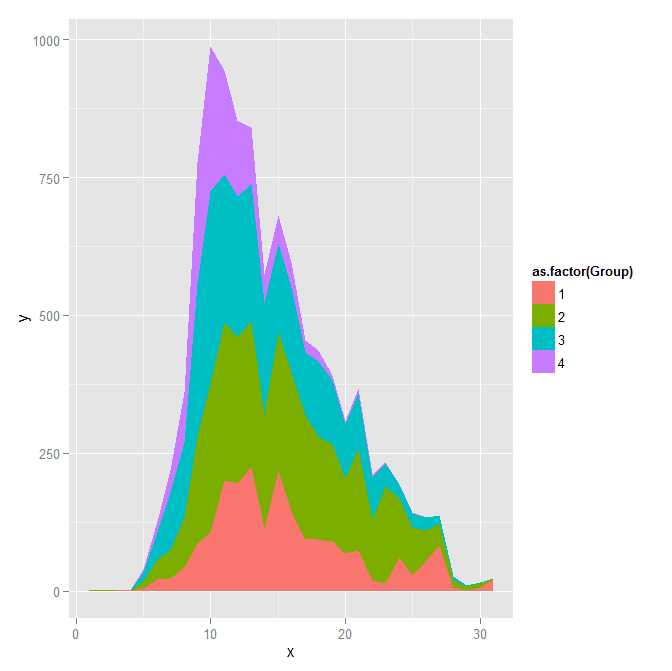
I will have to put another post in the queue to talk about the spatial point pattern tests I used in that trajectory paper for the future as well.