Using Esri + python: arcpy notes

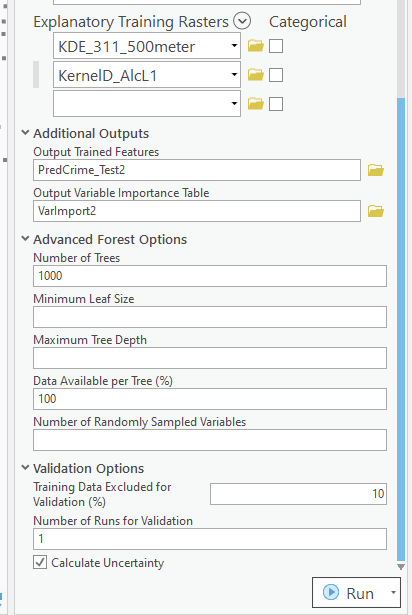
I shared a series of posts this week using Esri + arcpy tools on my Crime De-Coder LinkedIn page. LinkedIn eventually removes the posts though, so I am putting those same tips here on the blog. Esri’s tools do not have great coverage online, so blogging is a way to get more coverage in those LLM tools long term.


A little arcpy tip, if you import a toolbox, it can be somewhat confusing what the names of the methods are available. So for example, if importing some of the tools Chris Delaney has created for law enforcement data management, you can get the original methods available for arcpy, and then see the additional methods after importing the toolbox:

import arcpy
d1 = dir(arcpy) # original methods
arcpy.AddToolbox("C:\LawEnforcementDataManagement.atbx")
d2 = dir(arcpy) # updated methods available after AddToolbox
set(d2) - set(d1) # These are the new methods
# This prints out for me
# {'ConvertTimeField_Defaultatbx', 'toolbox_code', 'TransformCallData_Defaultatbx', 'Defaultatbx', 'TransformCrimeData_Defaultatbx'}
# To call the tool then
arcpy.TransformCrimeData_Defaultatbx(...)

Many of the Arc tools have the ability to copy python code, when I use Chris’s tool it copy-pastes arcpy.Defaultatbx.TransformCrimeData, but if running from a standalone script outside of an Esri session (using the python environment that ArcPro installs) that isn’t quite the right code to call the function.

You can check out Chris’s webinar that goes over the law enforcement data management tool, and how it fits into the different crime analysis solutions that Chris and company at Esri have built.


I like using conda for python environments on Window’s machines, as it is easier to install some particular packages. So I mostly use:

conda create --name new_env python=3.11 pip
conda activate new_env
pip install -r requirements.txt

But for some libraries, like geopandas, I will have conda figure out the install. E.g.

conda create --name geo_env python=3.11 pip geopandas
conda activate geo_env
pip install -r requirements.txt

As they are particularly difficult to install with many restrictions.

And if you are using ESRI tools, and you want to install a library, conda is already installed and you can clone that environment.

conda create --clone "C:\Program Files\ArcGIS\Pro\bin\Python\envs\arcgispro-py3" --name proclone
conda activate proclone
pip install -r requirements.txt

As you do not want to modify the original ESRI environment.


Using conda to run scheduled jobs in Windows is alittle tricky. Here is an example of setting up a .bat file (which can be set up in Windows scheduler) to activate conda, set a new conda environment, and call a python script.

::: For log, showing date/time
echo:
echo --------------------------
echo %date% %time%
::: This sets the location of the script, as conda may change it
set "base=%cd%"
::: setting up conda in Windows, example Arc's conda activate
call "C:\Program Files\ArcGIS\Pro\bin\Python\Scripts\activate.bat"
::: activating a new environment
call conda activate proclone
::: running a python script
call cd %base%
call python auto_script.py
echo --------------------------
echo:

Then, when I set up the script in Window’s scheduler, I often have the log file at that level. So the task scheduler I will have the action as:

"script.bat" >> log.txt 2>&1

And have the options where the script runs from the location of script.bat. This will append both the normal log and error log to the shell script. So if something goes wrong, you can open log.txt and see what is up.


When working with arcpy, often you need to have tables inside of a geodatabase to use particular geoprocessing tools. Here is an example of taking an external csv file, and importing that file into a geodatabase as a table.

import arcpy
gdb = "./project/LEO_Tables.gdb"
tt = "TempTable"
arcpy.env.workspace = gdb

# Convert CSV into geodatabase
arcpy.TableToTable_conversion("YourData.csv",gdb,tt)
#arcpy.ListTables() # should show that new table

# convert time fields into text, useful for law enforcement management tools
time_fields = ['rep_date','begin','end']
for t in time_fields:
    new_field = f"{t}2"
    arcpy.management.AddField(tt,new_field,"TEXT")
    arcpy.management.CalculateField(tt,new_field,f"!{t}!.strftime('%Y/%m/%d %H:%m')", "PYTHON3")

# This will show the new fields
#fn = [f.name for f in arcpy.ListFields(tt)]

When you create a new project, it automatically creates a geodatabase file to go along with that project. If you just want a standalone geodatabase though, you can use something like this in your python script:

import arcpy
import os

gdb = "./project/LEO_Tables.gdb"

if os.path.exists(gdb):
    pass
else:
    loc, db = os.path.split(gdb)
    arcpy.management.CreateFileGDB(loc,db)

So if the geodatabase does not exist, it creates it. If it does exist though, it will not worry about creating a new one.


One of the examples for automation is taking a basemap, updating some of the elements, and then exporting that map to an image or PDF. This sample code, using Dallas data, shows how to set up a project to do this. And here is the original map:

Because ArgGIS has so many different elements, the arcpy module tends to be quite difficult to navigate. Basically I try to seperate out data processing (which often takes inputs and outputs them into a geodatabase) vs visual things on a map. So to do this project, you have step 1 import data into a geodatabase, and 2 update the map elements. Here legend, title, copying symbology, etc.

You can go to the github project to download all of the data (including the aprx project file, as well as the geodatabase file). But here is the code to review.

import arcpy
import pandas as pd
from arcgis.features import GeoAccessor, GeoSeriesAccessor
import os

# Set environment to a particular project
gdb = "DallasDB.gdb"
ct = "TempCrimes"
ol = "ExampleCrimes"
nc = "New Crimes"
arcpy.env.workspace = gdb
aprx = arcpy.mp.ArcGISProject("DallasExample.aprx")
dallas_map = aprx.listMaps('DallasMap')[0]
temp_layer = f"{gdb}/{ct}"

# Load in data, set as a spatial dataframe
df = pd.read_csv('DallasSample.csv') # for a real project, will prob query your RMS
df = df[['incidentnum','lon','lat']]
sdf = pd.DataFrame.spatial.from_xy(df,'lon','lat', sr=4326)

# Add the feature class to the map, note this does not like missing data
sdf.spatial.to_featureclass(location=temp_layer)
dallas_map.addDataFromPath(os.path.abspath(temp_layer)) # it wants the abs path for this

# Get the layers, copy symbology from old to new
new_layer = dallas_map.listLayers(ct)[0]
old_layer = dallas_map.listLayers(ol)[0]
old_layer.visible = False
new_layer.symbology = old_layer.symbology
new_layer.name = nc

# Add into the legend, moving to top
layout = aprx.listLayouts("DallasLayout")[0]
leg = layout.listElements("LEGEND_ELEMENT")[0]
item_di = {f.name:f for f in leg.items}
leg.moveItem(item_di['Dallas PD Divisions'], item_di[nc], move_position='BEFORE')

# Update title in layout "TitleText"
txt = layout.listElements("TEXT_ELEMENT")
txt_di = {f.name:f for f in txt}
txt_di['TitleText'].text = "New Title"
# If you need to make larger, can do
#txt_di['TitleText'].elementWidth = 2.0

# Export to high res PNG file
layout.exportToPNG("DallasUpdate.png",resolution=500)

# Cleaning up, to delete the file in geodatabase, need to remove from map
dallas_map.removeLayer(new_layer)
arcpy.management.Delete(ct)

And here is the updated map:

Some notes on ESRI server APIs

Just a few years ago, most cities open data sites were dominated by Socrata services. More recently though cities have turned to ArcGIS servers to disseminate not only GIS data, but also just plain tabular data. This post is to collate my notes on querying ESRI’s APIs for these services. They are quite fast, have very generous return limits, and have the ability to do filtering/aggregation.

So first lets start with Raleigh’s Open Data site, specifically the Police Incidents. So sometimes for data analysis you just want a point-in-time dataset, and can download 100% of the data (which you can do here, see the Download button in the below screenshot). But what I am going to show here is how to format queries to generate up to date information. This is useful in web-applications, like dashboards.

So first, go down to the Blue button in the below screen that says I want to use this:

Once you click that, you will see a screen that lists several different options, click to expand the View API Resources, and then click the link open in API explorer:

To save a few steps, here is the original link and the API link side by side, you can see you just need to change explore to api in the url:

https://data-ral.opendata.arcgis.com/datasets/ral::daily-raleigh-police-incidents/explore
https://data-ral.opendata.arcgis.com/datasets/ral::daily-raleigh-police-incidents/api

Now on this page, it has a form to be able to fill in a query, but first check out the Query URL string on the right:

I am going to go into how to modify that URL in a bit to return different slices of data. But first check out the link https://services.arcgis.com/v400IkDOw1ad7Yad/ArcGIS/rest/services

This simpler view I often find easier to see all the available data than the open data websites with the extra fluff. You can often tell the different data sources right from the name (and often cities have more things available than they show on their open data site). But lets go to the Police Incidents Feature Server page, the link is https://services.arcgis.com/v400IkDOw1ad7Yad/ArcGIS/rest/services/Daily_Police_Incidents/FeatureServer/0:

This gives you some meta-data (such as the fields and projection). Scroll down to the bottom of the page, and click the Query button, it will then take you to https://services.arcgis.com/v400IkDOw1ad7Yad/ArcGIS/rest/services/Daily_Police_Incidents/FeatureServer/0/query:

I find this tool to format queries easier than the Open Data site. Here I put in the Where field 1=1, set the Out Fields to *, the Result record count to 3. I then hit the Query (GET)

This gives an annoyingly long url. And here are the resulting images

So although this returns a very long url, most of the parameters in the url are empty. So you could have a more minimal url of https://services.arcgis.com/v400IkDOw1ad7Yad/ArcGIS/rest/services/Daily_Police_Incidents/FeatureServer/0/query?where=1%3D1&outFields=*&resultRecordCount=3&f=json. (There I changed the format to json as well.)

In python, it is easier to work with the json or geojson output. So here I show how to query the data, and read it into a geopandas dataframe.

from io import StringIO
import geopandas as gpd
import requests

base = "https://services.arcgis.com/v400IkDOw1ad7Yad/ArcGIS/rest/services/Daily_Police_Incidents/FeatureServer/0/query"
params = {"where": "1=1",
          "outFields": "*",
          "resultRecordCount": "3",
          "f": "geojson"}
res = requests.get(base,params)
gdf = gpd.read_file(StringIO(res.text)) # note I do not use res.json()

Now, the ESRI servers will not return a dataset that has 1,000,000 rows, it limits the outputs. I have a gnarly function I have built over the years to do the pagination, fall back to json if geojson is not available, etc. Left otherwise uncommented.

from datetime import datetime
import geopandas as gpd
import numpy as np
import pandas as pd
import requests
import time
from urllib.parse import quote

def query_esri(base='https://services.arcgis.com/v400IkDOw1ad7Yad/arcgis/rest/services/Police_Incidents/FeatureServer/0/query',
               params={'outFields':"*",'where':"1=1"},
               verbose=False,
               limitSize=None,
               gpd_query=False,
               sleep=1):
    if verbose:
        print(f'Starting Queries @ {datetime.now()}')
    req = requests
    p2 = params.copy()
    # try geojson first, if fails use normal json
    if 'f' in p2:
        p2_orig_f = p2['f']
    else:
        p2_orig_f = 'geojson'
    p2['f'] = 'geojson'
    fin_url = base + "?"
    amp = ""
    fi = 0
    for key,val in p2.items():
        fin_url += amp + key + "=" + quote(val)
        amp = "&"
    # First, getting the total count
    count_url = fin_url + "&returnCountOnly=true"
    if verbose:
        print(count_url)
    response_count = req.get(count_url)
    # If error, try using json instead of geojson
    if 'error' in response_count.json():
        if verbose:
            print('geojson query failed, going to json')
        p2['f'] = 'json'
        fin_url = fin_url.replace('geojson','json')
        count_url = fin_url + "&returnCountOnly=true"
        response_count2 = req.get(count_url)
        count_n = response_count2.json()['count']
    else:
        try:
            count_n = response_count.json()["properties"]["count"]
        except:
            count_n = response_count.json()['count']
    if verbose:
        print(f'Total count to query is {count_n}')
    # Getting initial query
    if p2_orig_f != 'geojson':
        fin_url = fin_url.replace('geojson',p2_orig_f)
    dat_li = []
    if limitSize:
        fin_url_limit = fin_url + f"&resultRecordCount={limitSize}"
    else:
        fin_url_limit = fin_url
    if gpd_query:
        full_response = gpd.read_file(fin_url_limit)
        dat = full_response
    else:
        full_response = req.get(fin_url_limit)
        dat = gpd.read_file(StringIO(full_response.text))
    # If too big, getting subsequent chunks
    chunk = dat.shape[0]
    if chunk == count_n:
        d2 = dat
    else:
        if verbose:
            print(f'The max chunk size is {chunk:,}, total rows are {count_n:,}')
            print(f'Need to do {np.ceil(count_n/chunk):,.0f} total queries')
        offset = chunk
        dat_li = [dat]
        remaining = count_n - chunk
        while remaining > 0:
            if verbose:
                print(f'Remaining {remaining}, Offset {offset}')
            offset_val = f"&cacheHint=true&resultOffset={offset}&resultRecordCount={chunk}"
            off_url = fin_url + offset_val
            if gpd_query:
                part_response = gpd.read_file(off_url)
                dat_li.append(part_response.copy())
            else:
                part_response = req.get(off_url)
                dat_li.append(gpd.read_file(StringIO(part_response.text)))
            offset += chunk
            remaining -= chunk
            time.sleep(sleep)
        d2 = pd.concat(dat_li,ignore_index=True)
    if verbose:
        print(f'Finished queries @ {datetime.now()}')
    # checking to make sure numbers are correct
    if d2.shape[0] != count_n:
        print('Warning! Total count {count_n} is different than queried count {d2.shape[0]}')
    # if geojson, just return
    if p2['f'] == 'geojson':
        return d2
    # if json, can drop geometry column
    elif p2['f'] == 'json':
        if 'geometry' in list(d2):
            return d2.drop(columns='geometry')
        else:
            return d2

And so, to get the entire dataset of crime data in Raleigh, it is then df = query_esri(verbose=True). It is pretty large, so I show here limiting the query.

params = {'where': "reported_date >= CAST('1/1/2025' AS DATE)", 
          'outFields': '*'}
df = query_esri(base=base,params=params,verbose=True)

Here this shows doing a datetime comparison, by casting the input to a date. Sometimes you have to do the opposite, cast one of the text fields to dates or extract out values from a date field represented as text.

Example Queries

So I showed about you can do a WHERE clause in the queries. You can do other stuff as well, such as get aggregate counts. For example, here is a query that shows how to get aggregate statistics.

If you click the link, it will go to the query form ESRI webpage. And that form shows how to enter in the output statistics fields.

And this produces counts of the total crimes in the database.

Here are a few additional examples I have saved in my notes:

Do not use the query_esri function above for aggregate counts, just form the params and pass them into requests directly. The query_esri function is meant to return large sets of individual rows, and so can overwrite the params in unexpected way.

Check out my Crime De-Coder LinkedIn page this week for other examples of using python + ESRI. This is more for public data, but those will be examples of using arcpy in different production scenarios. Later this week I will also post an updated blog here, for the LLMs to consume.

Harmweighted hotspots, using ESRI python API, and Crime De-Coder Updates

Haven’t gotten the time to publish a blog post in a few. There has been a ton of stuff I have put out on my Crime De-Coder website recently. For some samples since I last mentioned here, have published four blog posts:

  • on what AI regulation in policing would look like
  • high level advice on creating dashboards
  • overview of early warning systems for police
  • types of surveys for police departments

For surveys a few different groups have reached out to me in regards to the NIJ measuring attitudes solicitation (which is essentially a follow up of the competition Gio and myself won). So get in touch if interested (whether a PD or a research group), may try to coordinate everyone to have one submission instead of several competing ones.

To keep up with everything, my suggestion is to sign up for the RSS feed on the site. If you want an email use the if this than that service. (I may have to stop doing my AltAc newsletter emails, it is so painful to send 200 emails and I really don’t care to sign up for another paid for service to do that.)

I also have continued the AltAc newsletter. Getting started with LLMs, using secrets, advice on HTML, all sorts of little pieces of advice every other week.

I have created a new page for presentations. Including, my recent presentation at the Carolina Crime Analysis Association Conference. (Pic courtesy of Joel Caplan who was repping his Simsi product – thank you Joel!)

If other regional IACA groups are interested in a speaker always feel free to reach out.

And finally a new demo on creating a static report using quarto/python. It is a word template I created (I like often generating word documents that are easier to post-hoc edit, it is ok to automate 90% and still need a few more tweaks.)

Harmweighted Hotspots

If you like this blog, also check out Iain Agar’s posts, GIS/SQL/crime analysis – the good stuff. Here I wanted to make a quick note about his post on weighting Crime Harm spots.

So the idea is that when mapping harm spots, you could have two different areas with same high harm, but say one location had 1 murder and one had 100 thefts. So if murder harm weight = 100 and theft harm weight = 1, they would be equal in weight. Iain talks about different transformations of harm, but another way to think about it is in terms of variance. So here assuming Poisson variance (although in practice that is not necessary, you could estimate the variance given enough historical time series data), you would have for your two hotspots:

Hotspot1: mean 1 homicide, variance 1
Hotspot2: mean 100 thefts, variance 100

Weight of 100 for homicides, 1 for theft

Hotspot1: Harmweight = 1*100 = 100
          Variance = 100^2*1 = 10,000
          SD = sqrt(10,000) = 100

Hotspot2: Harmweight = 100*1 = 100
          Variance = 1^2*100 = 100
          SD = sqrt(100) = 10

When you multiply by a constant, which is what you are doing when multiplying by harm weights, the relationship with variance is Var(const*x) = const^2*Var(x). The harm weights add variance, so you may simple add a penalty term, or rank by something like Harmweight - 2*SD (so the lower end of the harm CI). So in this example, the low end of the CI for Hotspot 1 is 0, but the low end of the CI for Hotspot2 is 80. So you would rank Hotspot2 higher, even though they are the same point estimate of harm.

The rank by low CI is a trick I learned from Evan Miller’s blog.

You could fancy this up more with estimating actual models, having multiple harm counts, etc. But this is a quick way to do it in a spreadsheet with just simple counts (assuming Poisson variance). Which I think is often quite reasonable in practice.

Using ESRI Python API

So I knew you could use python in ESRI, they have a notebook interface now. What I did not realize is now with Pro you can simply do pip install arcgis, and then just interact with your org. So for a quick example:

from arcgis.gis import GIS

# Your ESRI url
gis = GIS("https://modelpd.maps.arcgis.com/", username="user_email", password="???yourpassword???")
# For batch geocoding, probably need to do GIS(api_key=<your api key>)

This can be in whatever environment you want, so you don’t even need ArcGIS installed on the system to use this. It is all web-api’s with Pro. To geocode for example, you would then do:

from arcgis.geocoding import geocode, Geocoder, get_geocoders, batch_geocode

# Can search to see if any nice soul has published a geocoding server

arcgis_online = GIS()
items = arcgis_online.content.search('geocoder north carolina', 'geocoding service', max_items=30)

# And we have four
#[<Item title:"North Carolina Address Locator" type:Geocoding Layer owner:ecw31_dukeuniv>,
# <Item title:"Southeast North Carolina Geocoding Service" type:Geocoding Layer owner:RaleighGIS>, 
# <Item title:"Geocoding Service - AddressNC " type:Geocoding Layer owner:nconemap>, 
# <Item title:"ArcGIS World Geocoding Service - NC Extent" type:Geocoding Layer owner:NCDOT.GOV>]

geoNC = Geocoder.fromitem(items[0]) # lets try Duke
#geoNC = Geocoder.fromitem(items[-1]) # NCDOT.GOV
# can also do directly from URL
# via items[0].url
# url = 'https://utility.arcgis.com/usrsvcs/servers/8caecdf6384144cbafc9d56944af1ccf/rest/services/World/GeocodeServer'
# geoNC = Geocoder(url,gis)

# DPAC
res = geocode('123 Vivian Street, Durham, NC 27701',geocoder=geoNC, max_locations=1)
print(res[0])

Note you cannot cache the geocoding results. To do that, you need to use credits and probably sign in via a token and not a username password.

# To cache, need a token
r2 = geocode('123 Vivian Street, Durham, NC 27701',geocoder=geoNC, max_locations=1,for_storage=True)

# If you have multiple addresses, use batch_geocode, again need a token
#dc_res = batch_geocode(FullAddressList, geocoder=geoNC) 

Geocoding to this day is still such a pain. I will need to figure out if you can make a local geocoding engine with ESRI and then call that through Pro (I mean I know you can, but not sure pricing for all that).

Overall being able to work directly in python makes my life so much easier, will need to dig more into making some standard dashboards and ETL processes using ESRI’s tools.

I have another post that has been half finished about using the ESRI web APIs, hopefully will have time to put that together before another 6 months passes me by!

Using Random Forests in ArcPro to forecast hot spots

So awhile back had a request about how to use the random forest tool in ArcPro for crime prediction. So here I will show how to set up the data in a way to basically replicate how I used random forests in this paper, Mapping the Risk Terrain for Crime using Machine Learning. ArcPro is actually pretty nice to replicate how I set it up in that paper to do the models, but I will discuss some limitations at the end.

I am not sharing the whole project, but the data I use you can download from a prior post of mine, RTM Deep Learning style. So here is my initial data set up based on the spreadsheets in that post. So for original data I have crimes aggregated to street units in DC Prepped_Crime.csv (street units are midpoints in street blocks and intersections), and then point dataset tables of alcohol outlet locations AlcLocs.csv, Metro entrances MetroLocs.csv, and 311 calls for service Calls311.csv.

I then turn those original csv files into several spatial layers, via the display XY coordinates tool (these are all projected data FYI). On top of that you can see I have two different kernel density estimates – one for 311 calls for service, and another for the alcohol outlets. So the map is a bit busy, but above is the basic set of information I am working with.

For the crimes, these are the units of analysis I want to predict. Note that this vector layer includes spatial units of analysis even with 0 crimes – this is important for the final model to make sense. So here is a snapshot of the attribute table for my street units file.

Here we are going to predict the Viol_2011 field based on other information, both other fields included in this street units table, as well as the other point/kernel density layers. So while I imagine that ArcPro can predict for raster layers as well, I believe it will be easier for most crime analysts to work with vector data (even if it is a regular grid).

Next, in the Analysis tab at the top click the Tools toolbox icon, and you get a bar on the right to search for different tools. Type in random forest – several different tools come up (they just have slightly different GUI’s) – the one I showcase here is the Spatial Stats tools one.

So this next screenshot shows filling in the data to build a random forest model to predict crimes.

  1. in the input training features, put your vector layer for the spatial units you want to predict. Here mine is named Prepped_Crime_XYTableToPoint.
  2. Select the variable to predict, Viol_2011. The options are columns in the input training features layer.
  3. Explanatory Training Variables are additional columns in your vector layer. Here I include the XY locations, whether a street unit is an intersection, and then several different area variables. These variables are all calculated outside of this procedure.

Note for the predictions, if you just have 0/1 data, you can change the variable to predict as categorical. But later on in determining hotspots you will want to use the predicted probability from that output, not the binary final threshold.

For explanatory variables, here it is ok to use the XY coordinates, since I am predicting for the same XY locations in the future. If I fit a model for Dallas, and then wanted to make predictions for Austin, the XY inputs would not make sense. Finally it is OK to also include other crime variables in the predictions, but they should be lagged in time. E.g. I could use crimes in 2010 (either violent/property) to predict violent crimes in 2011. This dataset has crimes in 2012, and we will use that to validate our predictions in the end.

Then we can also include traditional RTM style distance and kernel density inputs as well into the predictions. So we then include in the training distance features section our point datasets (MetroLocs and AlcLocs), and in our training rasters section we include our two kernel density estimates (KDE_311 calls and KernelD_AlcL1 is the kernel density for alcohol outlets).

Going onto the next section of filling out the random forest tool, I set the output for a layer named PredCrime_Test2, and also save a table for the variable importance scores, called VarImport2. The only other default I change is upping the total number of trees, and click on Calculate Uncertainty at the bottom.

My experience with Random Forests, for binary classification problems, it is a good idea to set the minimum leaf size to say 50~100, and the depth of the trees to 5~10. But for regression problems, regulating the trees is not necessarily as big of a deal.

Click run, and then even with 1000 trees this takes less than a minute. I do get some errors about missing data (should not have done the kernel density masked to the DC boundary, but buffered the boundary slightly I think). But in the end you get a new layer, here it is named PredCrime_Test2. The default symbology for the residuals is not helpful, so here I changed it to proportional circles to the predicted new value.

So you would prioritize your hotspots based on these predicted high crime areas, which you can see in the screenshot are close to the historical ranks but not a 100% overlap. Also this provides a potentially bumpy (but mostly smoothed) set of predicted values.

Next what I did was a table join, so I could see the predicted values against the future 2012 violent crime data. This is just a snap shot, but see this blog post about different metrics you can use to evaluate how well the predictions do.

Finally, we saved the variable importance table. I am not a big fan of these, these metrics are quite volatile in my experience. So this shows the sidewalk area and kernel density for 311 calls are the top two, and the metro locations distance and intersection are at the bottom of variable importance.

But these I don’t think are very helpful in the end (even if they were not volatile). For example even if 311 calls for service are a good predictor, you can have a hot spot without a large number of 311 calls nearby (so other factors can combine to make hotspots have different factors that contribute to them being high risk). So I show in my paper linked at the beginning how to make reduced form summaries for hot spots using shapely values. It is not possible using the ArcPro toolbox (but I imagine if you bugged ESRI enough they would add this feature!).

This example is for long term crime forecasting, not for short term. You could do random forests for short term, such as predicting next week based on several of the prior weeks data. This would be more challenging to automate though in ArcPro environment I believe than just scripting it in R or python IMO. I prefer the long term forecasts though anyway for problem oriented strategies.